

Imagination to Painting: How I take an Idea and Create a Finished Work of Art

Step#1: Finding Inspiration
Sometimes trying to come up with a new idea for a painting can be challenging. Here’s how I spark my imagination and come up with new ideas for artwork.

Getting in the Mood
1. Listening to Music: I have a few go-to playlists if I want something specific. Sometimes I explore on Pandora, YouTube, or Epidemic Sound to expand my collections. My current favorites are the “Dark Forest” playlists from Alexrainbirdmusic or searching for “dark academia” playlists.
2. Pinterest: I love looking at Pinterest for color schemes and references. I do have to say that I never copy anything I find on Pinterest (that would break copyright laws), but it does help me visualize the general structure or anatomy of whatever I want to create.
3. Instagram: Sometimes I look at other artists’ works, but more often I look at my own page. I know that may seem a bit… indulgent at first, but allow me to explain.
I do get inspired by reminding myself of who I am as an artist. I look at my own style and artistic perspective when I feel lost in possibilities. Sometimes I need the reminder of how far I’ve come and where I would like to go.
4. Going outside: I can be a bit of a hermit and at times I need to push myself to get outside and live life, learn about other things, and gain new perspectives. Most often, I crave getting out into the woods, sitting in front of a campfire, and observing what’s going on around me. Sometimes going out to a movie or getting coffee with a friend sparks a new concept for me. I’m not too much of a people watcher, but occasionally observing other people can give me an idea for a painting.

Step #2: Sketch it out
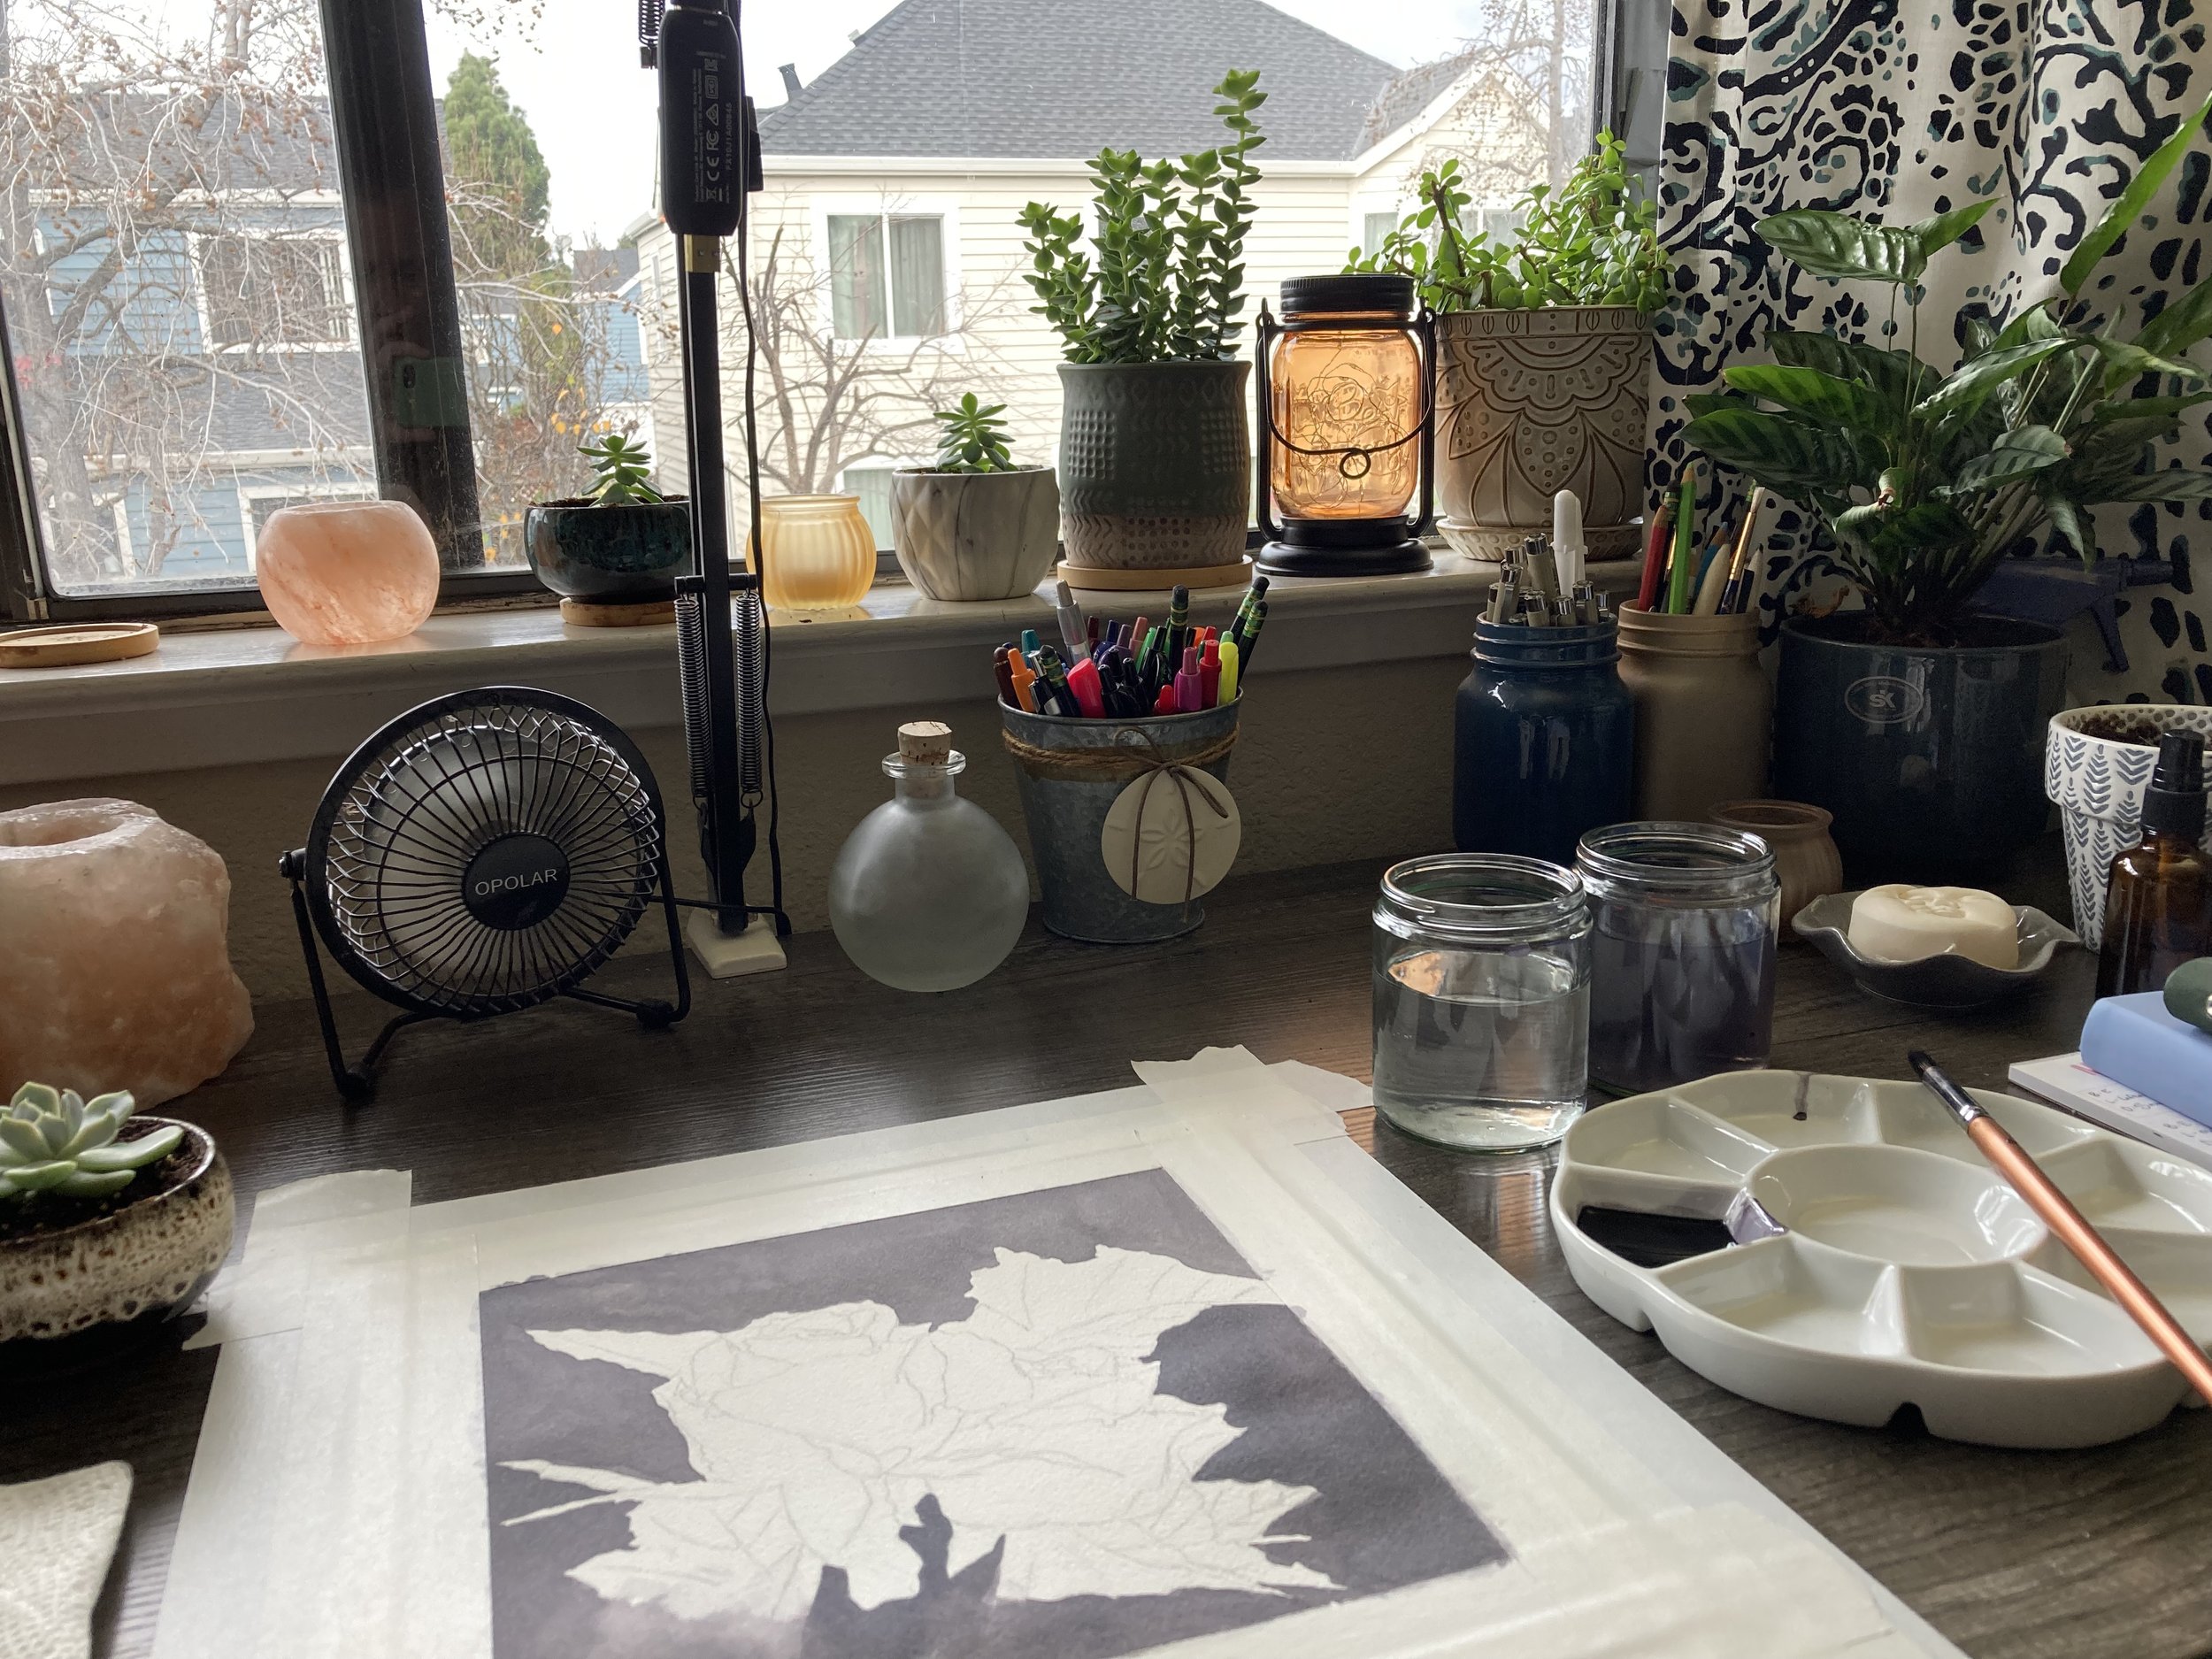
I’ll usually start in my sketchbook or on some tracing paper to block out my shapes. I’m looking for good composition in the size paper I’m planning for.
When I’m happy with the sketch, I’ll take a picture and edit it in Adobe Photoshop. This is especially helpful if I have a drawing in my sketchbook that is small and I would like to enlarge it.
The last step in transferring the image is to print it and trace it onto my watercolor paper.
This whole process helps me to efficiently take care of mistakes in the sketch and have the cleanest surface to work with when I move to painting.
Step #3: Painting
There are a lot of different approaches and techniques that go into this phase, but here are the basics:
1. Materials: I work with Liquitex acrylic ink using a lot of watercolor techniques. I prefer ink because of the vibrancy of the color and ease of layering. The paper is either Canson Cold Press Watercolor Paper or Arches Cold Press Watercolor Paper. Both are acid free and have enough texture for using colored pencil. My details are drawn in with Caran d’Ache Luminance and Faber-Castell Polychromos Pencils.
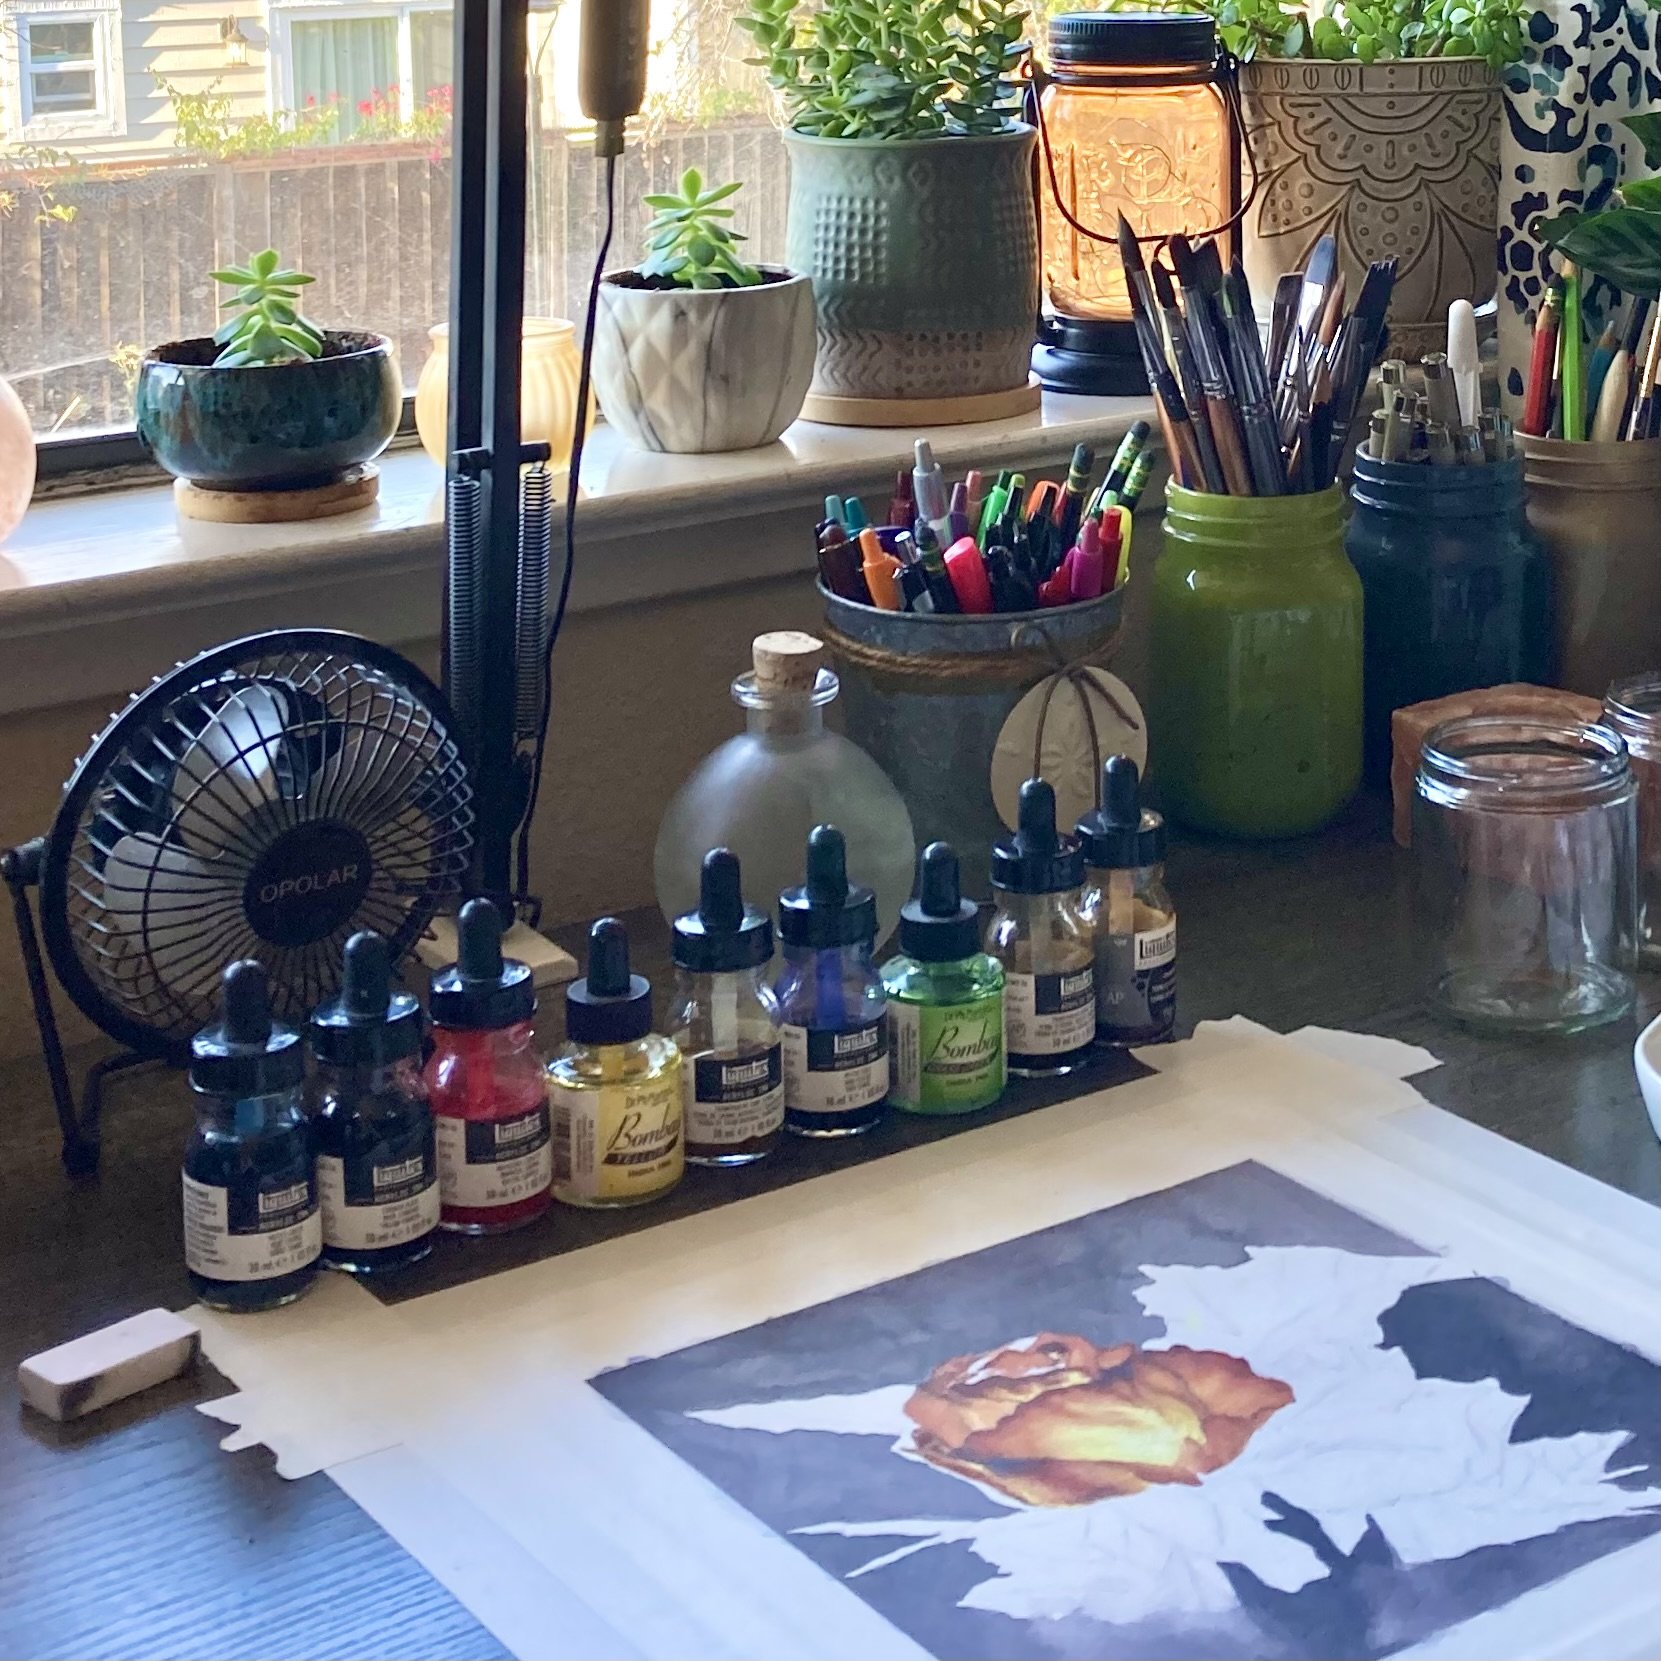
2. Process: I paint in layers (light to dark and foreground to background). There are exceptions (like in the above painting). I blocked in my background color first. This helped me establish the range of values in my work.

3. Details: The final details are put in with colored pencil. This is when I put in delicate highlights and add textures.

Step #4: The Completed Painting
I love being able to peel back the tape of a finished work.
I hope this has been a fun look behind the scenes. Check out my social media sites for more process content.
~Angie